



The purpose of this connector is to publish products available in bindCommerce to stores built with WooCommerce. The publication can include all product data and images, or it can be limited to updating only specific fields, such as stock availability.
Connector execution can be triggered either in interactive mode, by clicking the dedicated button, or automatically through a scheduled process.
Product Publishing and Update
To proceed with publishing and/or updating products from bindCommerce to WooCommerce, it is necessary to create the appropriate configuration and the related connector.
Go to the bindCommerce menu:
eCommerce (sale channel) >> WooCommerce >> Product Publishing
Click Add in the top left corner and fill in the fields as follows:
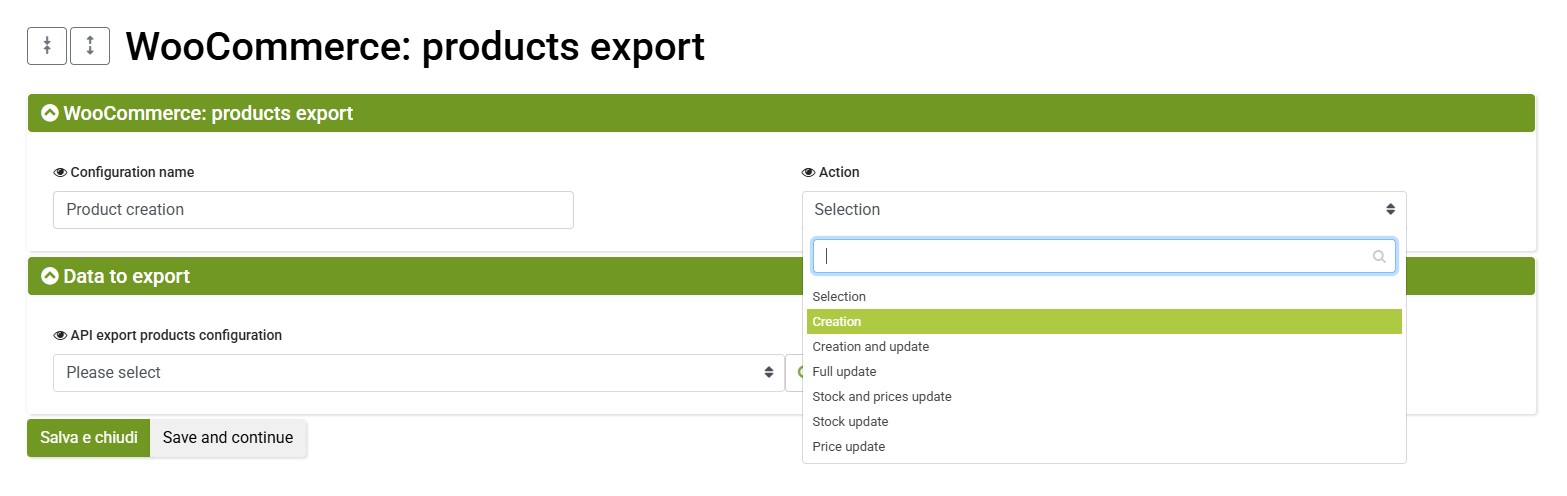
- Configuration Name: enter a name that identifies the type of action performed by the configuration (e.g. New product publishing)
- Action: select the action you want to perform from the dropdown menu
At this point, in the Product Export API Configuration field, click the the green button +.
A new screen will open where you can specify the information you want to include during the export to WooCommerce:
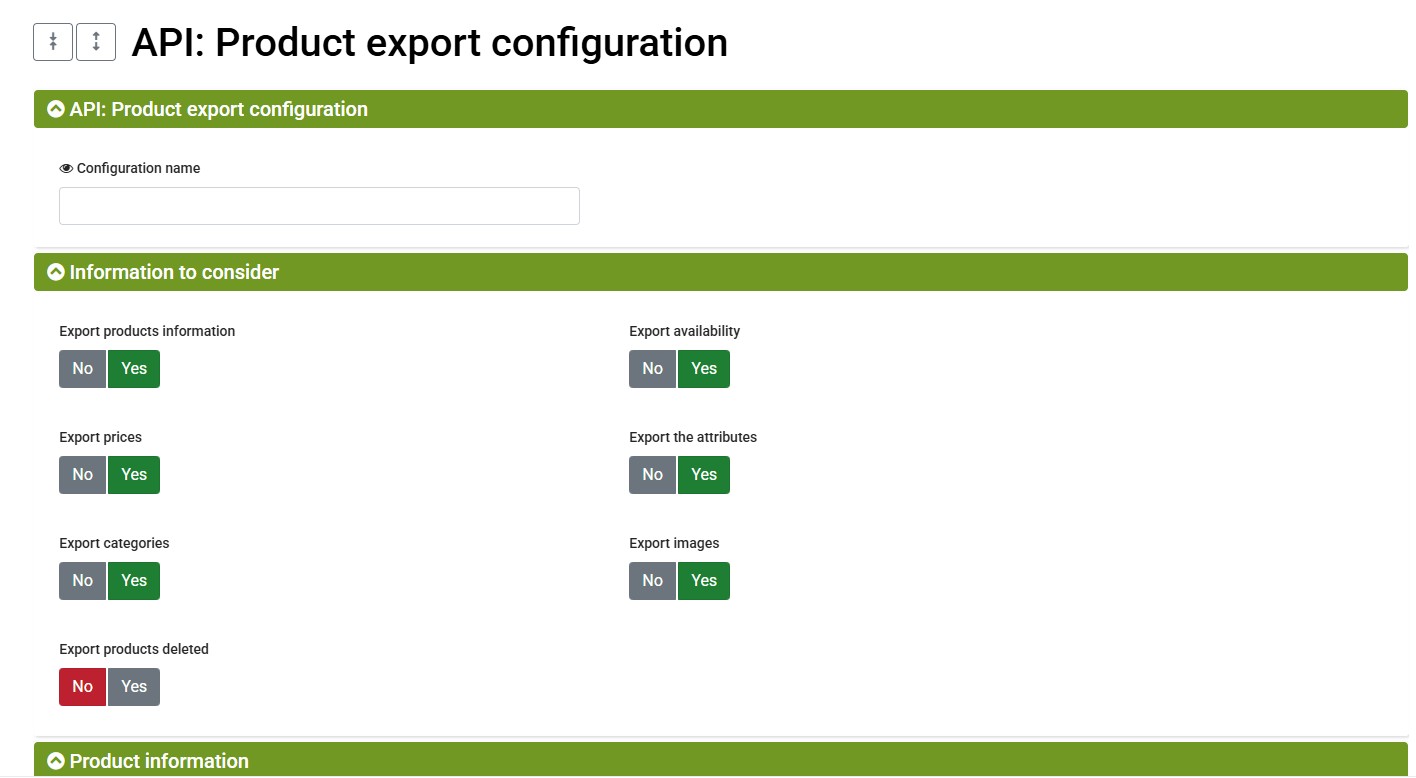
Fill in the fields on the screen as follows:
- Name: enter the preferred name
-
Export product information: allows you to send to WooCommerce all fields related to the product sheet, such as title, description, etc.
-
Export availability: allows you to send stock levels to WooCommerce
-
Export prices: allows you to send prices to WooCommerce
-
Export attributes: allows you to send attributes to WooCommerce (then select which attributes to include — all or only specific ones)
-
Export categories: allows you to send categories to WooCommerce and the product–category associations
-
Export images: allows you to send product images to WooCommerce
-
Export deleted products: allows you to send to WooCommerce also the products marked as Deleted in bindCommerce
For each selected option, additional dedicated sections will appear where you can precisely define which data to send to the website.
Finally, in the Number of products per file field, you can define how many products to include in a single file sent to WooCommerce. This feature is useful for distributing the workload required for data import on the receiving system. If the value is set to 0, the system processes all products included in the filter in a single file.
Leave the Web Server for file storage field empty and click SAVE AND CLOSE.
Once back on the previous screen, simply click SAVE AND CLOSE again to complete the configuration.
Now go to the WooCommerce plugin screen to perform the required configurations.
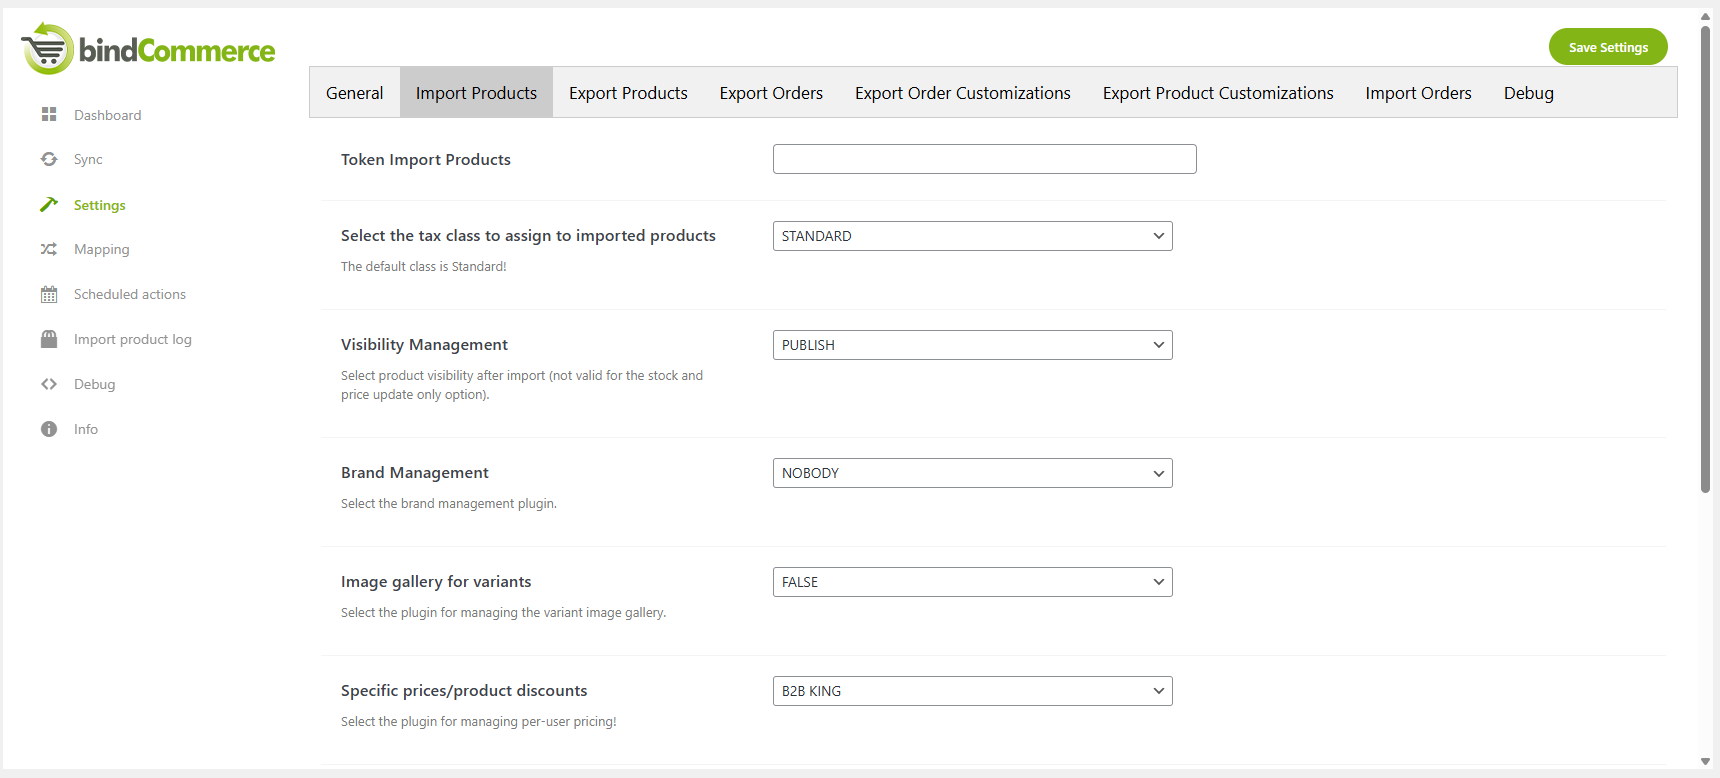
Specifically, go to the plugin menu Settings, then open the Import Products tab, where you can select the various preferences for managing items.
Once the configuration is complete, go to the bindCommerce menu:
Processes >> Connectors
Click Add in the top left corner and proceed with creating the connector by filling in the required fields:
- Connector Name: enter a name that represents the action performed by the connector (e.g. Publish new WooCommerce products)
- Node Type (technology): eCommerce WooCommerce
- Node: the node previously created
- Connector Type: eCommerce WooCommerce [Product Export]
Click SAVE AND CONTINUE to access the additional connector fields.
- Connector Configuration: select the configuration created earlier
- Product Filter: apply a filter to the products if needed (follow the instructions in the dedicated Product Filter Guide) Use differential approach for this connector?: it is recommended to enable the differential approach, whose functionality is described in the dedicated
Click SAVE AND CLOSE.
Thank you for rating this article.